
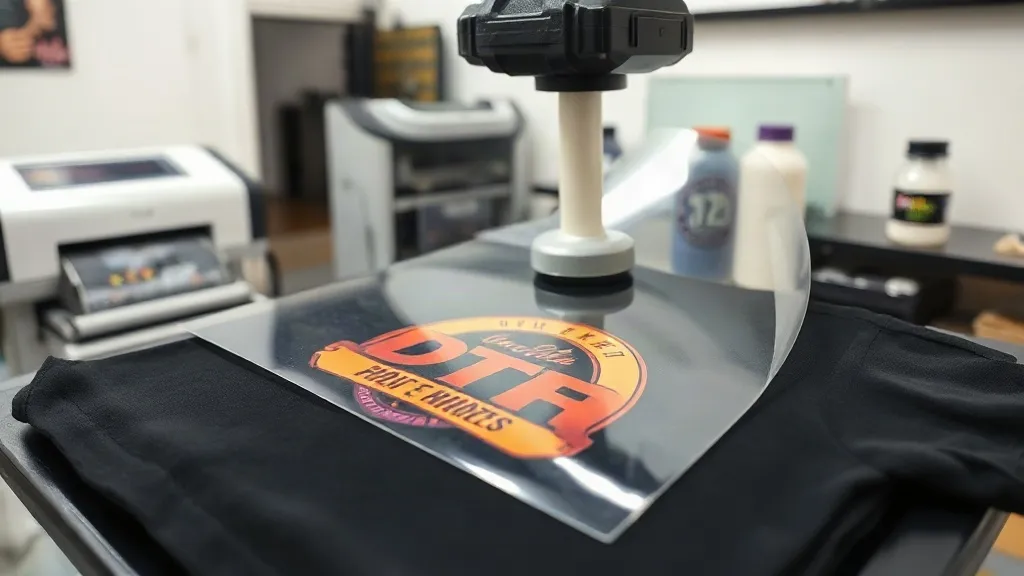
When you first start working with dtf transfers, it's easy to feel like you're chasing a moving target. One day the prints are perfect, the next they crack, fade, or refuse to adhere. The truth is, DTF printing is a dance of variables—temperature, pressure, timing, humidity, and ink quality all play a role. But once you understand how these elements interact, you can consistently produce vibrant, wash-durable prints that impress customers and keep them coming back.
In this guide, I'll walk you through the entire DTF workflow, from choosing the right film and powder to pressing techniques that eliminate common failures. I'll also share troubleshooting tips I've picked up after years of running a small print shop, where mistakes are costly and learning curves are steep. Whether you're a beginner or looking to refine your process, this guide will help you achieve flawless results.
What Are DTF Transfers and Why They Matter
DTF, or direct-to-film, is a printing method where your design is printed onto a special film, coated with adhesive powder, and then heat-pressed onto fabric. Unlike DTG or screen printing, DTF works on almost any fabric—cotton, polyester, blends, even dark colors—without the need for pre-treatment. The prints are stretchable, soft, and highly durable when done right.
The process is straightforward: print, powder, cure, press. But each step has nuances that affect the final outcome. For example, if the film isn't completely dry before powdering, the adhesive won't bond properly. If the press temperature is off by even 10 degrees, you might get poor adhesion or scorching. Understanding these details is what separates professional results from amateur attempts.
The Anatomy of a DTF Transfer
A DTF transfer consists of several layers: a release film, the printed ink (white and color), and a hot-melt adhesive powder. The film acts as a carrier, the ink provides the design, and the powder becomes the glue that bonds the ink to the fabric. Each layer must be applied correctly to ensure the transfer holds up to washing and stretching.
One common mistake is using too much powder. While it might seem like more adhesive equals better bonding, excess powder can create a stiff, plasticky feel and may not fully melt during curing, leading to poor wash durability. The goal is a thin, even coating that completely covers the wet ink but doesn't pile up.
Step-by-Step DTF Printing Process
Let's break down the DTF workflow into actionable steps. Following these will help you avoid the most common pitfalls.
1. Design and File Preparation
Start with a high-resolution file (300 DPI is standard). Ensure your colors are in CMYK mode, as DTF printers use CMYK inks. If your design has fine details or gradients, consider how the white ink layer will interact—sometimes a thicker white layer is needed for opacity on dark fabrics, but too much white can make the print stiff.
Mirror your design before printing. This is crucial because the transfer will be flipped when pressed onto the fabric. Forgetting to mirror results in backward text and images.
2. Printing
Load the DTF film into your printer, ensuring it's the correct side up (usually the matte side). Print the design, including the white ink layer. Most DTF printers have a setting for white ink density; for dark garments, you'll want a thicker white layer. Allow the print to dry slightly before powdering—about 30 seconds to a minute, depending on humidity.
Humidity is a silent killer in DTF printing. If your shop is too humid, the ink may not dry properly, leading to powder clumping. Aim for relative humidity between 40% and 60% for best results.
3. Powdering
Apply the hot-melt adhesive powder evenly over the wet ink. Use a powder shaker for consistent coverage, then shake off excess. You want a thin, uniform layer that sticks to the ink but doesn't pile up. A common trick is to gently rock the film back and forth to distribute the powder, then tap off the excess onto a tray.
Next, cure the powder. This can be done with a heat press or a dedicated curing oven. If using a heat press, set it to 160-170°C (320-340°F) and press for 10-15 seconds with light pressure. The powder should melt and turn glossy. Over-curing can make the adhesive brittle, so keep an eye on it.
4. Pressing
Now the transfer is ready to be pressed onto the fabric. Set your heat press to 150-160°C (300-320°F) and pre-press the garment for 5 seconds to remove moisture. Place the transfer on the fabric, cover with a protective sheet (Teflon or parchment), and press for 10-15 seconds with medium pressure (about 40-60 PSI).
Peel the film while it's still hot (hot peel) or after it cools (cold peel). Most DTF transfers are hot peel, but check the film's instructions. Peel smoothly and consistently—jerking can cause the design to lift or tear.
For multilayered or thick designs, you might need a second press for 5 seconds to ensure full adhesion.
Choosing the Right Supplies
Not all DTF films and powders are created equal. The quality of your supplies directly impacts the final print. Here's what to look for:
- Film: Choose a film that matches your printer's specifications. Premium films offer better ink absorption and release, reducing the risk of smudging or incomplete transfer.
- Powder: Use a high-quality hot-melt adhesive powder with a low melting point. Cheap powders may not melt evenly, leading to poor wash durability.
- Inks: Stick with reputable brands that are formulated for DTF. Off-brand inks can clog printheads and produce inconsistent colors.
If you're looking for reliable supplies, check out dtf transfers near me for local options or online suppliers with good reviews.
Troubleshooting Common DTF Issues
Even with the best supplies, problems can arise. Here are solutions to the most frequent issues:
Poor Adhesion After Washing
If the print peels or cracks after washing, it's usually due to insufficient pressure, incorrect temperature, or under-cured powder. Ensure your press is calibrated—use a heat gun or infrared thermometer to verify the platen temperature. Increase pressure if needed, and make sure the powder is fully melted during curing.
Cracking
Cracking often happens when the ink layer is too thick or the fabric stretches beyond the print's elasticity. Use a thinner white ink layer for stretchy fabrics, and consider a stretch additive in your ink. Also, ensure the garment is properly pre-pressed to remove wrinkles.
Fading
Fading can result from inadequate curing or low-quality ink. Make sure the powder is fully melted and the ink is dry before pressing. Store transfers in a cool, dry place away from direct sunlight to prevent premature fading.
Film Sticking to the Press
This happens when the transfer is pressed without a protective sheet or when the film is overheated. Always use a Teflon sheet or parchment paper between the press and the transfer. Also, check that your press is not set too high.
Pro Tips for Consistent Results
- Maintain a log: Record settings for each job—temperature, pressure, time, and supplies used. This helps you replicate success and troubleshoot faster.
- Test on scrap fabric: Before pressing a customer's garment, do a test press on a similar fabric to dial in settings.
- Keep your equipment clean: Regularly clean your printhead and press platen to avoid contamination.
- Control humidity: Use a dehumidifier if your shop is damp, and store film and powder in sealed containers.
For more detailed guidance on dtf techniques, explore our other resources.
Frequently Asked Questions
How long do DTF transfers last?
With proper application and care, DTF transfers can last 50+ washes. Wash inside out in cold water and avoid harsh detergents.
Can I use DTF on nylon or waterproof fabrics?
DTF adheres best to natural and synthetic fabrics with some texture. Nylon and waterproof fabrics may require special low-temperature powder or additional testing.
What's the difference between hot peel and cold peel?
Hot peel means removing the film immediately after pressing while it's still hot; cold peel means waiting until it cools. Hot peel is more common and faster, but cold peel can sometimes yield smoother results on certain fabrics.
Do I need a special printer for DTF?
Yes, DTF requires a printer with white ink capability, typically a modified inkjet or dedicated DTF printer. Converting a standard printer is possible but often not cost-effective.
How do I store unused transfers?
Keep them in a cool, dry place, away from direct sunlight. Stack them with parchment paper between layers to prevent sticking.
Mastering DTF transfers takes practice, but with the right knowledge and attention to detail, you can produce professional-quality prints that delight customers. Remember to source quality supplies, maintain your equipment, and never stop learning. For more tips and supplies, visit our dtf transfers page.